If you are one of those people who likes to jump in feet first, and only use the manual as a last resort, jump to Tutorial 1 below.
The fact that HTMLEdit, like most - if not all - other professional web authoring programs on all other computer platforms is not wysiwyg (what you see is what you get), and has to be previewed to see the page or effect you have just created, emphasises the need for preparation.
If you first decide on what are to be the main elements of your page, then analyse that to see how you are going to use the utilities within HTMLEdit Studio to create the various effects, you will be able to compile two lists -
and:
Some tips for productive working are:
Keep it simple
There is a temptation, when using as powerful an aid as HTMLEdit Studio to include as many effects as the program will allow. This is a mistake. First, it tends to increase significantly the time it takes for your pages to download on to a visitor's screen. This is as likely as not to result in them breaking off the connection, so your wonderful work will not even be seen! Second, it is just bad web design to use an effect because it is there, and regarded as 'uncool' by aficionados. Good pages are judged first by the relevance and interest of their content; next by the clarity and speed of their presentation and finally by the appropriateness of any effects used.
This applies equally to your use of colour and background on a page. The main criteria is readability. Typefaces in exotic colours are problematical because a) the colours may vary on different browsers, and what looks stunning on yours, may just be confusing or illegible on someone elses and b) everybody experiments with textured backgrounds, but they tend to get boring a lot faster than plain white, or at best, very simple textured backdrops.
Links, too, are there to help, rather than infuriate the visitor. As a rule of thumb, if you have a long page of text that is scrollable, it is useful to provide tags to each main subject heading, and at the end to return both to the top of the page, and back to an Index page, if one is provided (and you should include an index on any site that goes over three pages). It is also often useful to provide links to to other websites which deal with similar subject matter. However, here you have a choice to make. If you link a reader to another site in the middle of you own text, he/she may vanish altogether, and if the site to which you have pointed does not have a return link to you, you may have lost that visitor. They might of course refer to their own History list if they wish to return to you, but you run the risk of just being a stepping stone to someone else's site. One way of avoiding this is to annotate your text with numbers or letters in brackets, creating a 'Notes' section at the bottom of the text, and linking that to other sites. At least that way, your visitor reads your text before hopping a hypertext link to the other side of cyberspace!
If you are able to simplify a page by tabulating information rather than using a long text, do so. This is particularly important for comparative matter - stats, prices, etc. or for timetables. There may be other information you wish to display which is capable of conversion to tabular presentation, and if so, do it! In any browsing session, one is presented with page after page of text, and it is a relief to find a site where somebody has made it really easily to assimilate the key facts about any topic.
Remember that not everybody is equipped with the most modern software and computer equipment - particularly true on the Acorn platform, where quite early machines are still in use and capable of web access (impossible on an early PC or Mac!). The implications of this are that sophisticated imagery or animation and such utilities as Frames will not work on these machines, so it is a tremendous boon to such enthusiasts to be able to go into alternative pages on your site which are very simple and do not require masses of megabytes to view. This can be accomplished by simply using the text caption inserts presented on the dialogue boxes when inserting images, or going the whole hog and providing an alternative set of pages for non-frames users. You will make some grateful friends.
This session shows you how to produce a simple page. You will also import text, and preview your page in the Web Browser.
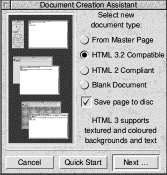
Document Creation Assistant
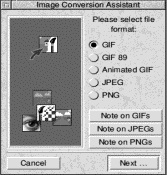
Image Conversion |
1) Move the pointer over the HTMLEdit icon on
the iconbar. Click once with Select. A window
should appear in the centre of the screen - the
Document Creation Assistant (DCA). The DCA
guides you through the process of creating your
HTMLEdit document. By default the HTML 3 radio icon is selected. For most use, you will want to use the HTML 3 options. The DCA is documented in the Reference Manual.
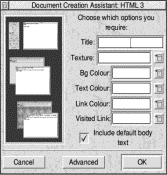
2) Just click on Next... to continue. You will be prompted to save your page - do so into the Tutorial directory under any filename you like. The HTML 3 DCA Window will open, allowing you to set up your page.
3) In the Title field type:
This will appear in the title bar of your HTML page when viewed, and is used as a form of identification for your page.
4) The Texture field is used for the filename of any tiled background image for your document. There is an example background in the Images directory within the Tutorial folder. Open this Images sub-directory remembering to first double click on the Tutorial directory to open it, and drag the Random 4 sprite file onto the DCA window. Since the image you dragged in was an Acorn sprite file - not a standard WWW Gif or JPEG, HTMLEdit realises that you might want to convert the sprite into a more widely understood format - hence the Image Conversion Assistant window which has appeared.
5) We shall use a standard Gif file, so simply click on Next... to continue. A further window opens allowing you to choose options for your Gif.
6)Select the Interlaced option - this is a useful option for all Gif files, as it causes the image to gradually build up in detail as it is downloaded from the WWW. Again, press Select over the Next... icon.
7) Save your file back into the Images directory, perhaps under the name Back/gif, although the name isn't particularly important. The file will then be converted and saved to disc, and its location will appear in the Texture field.
If you have saved the HTML document in the Tutorial directory, and the background in the Images directory under the above name, the location should be as follows:
8) Finally, if you wish to have coloured text, or a coloured background, you could use the lower four fields to select colours. The colours can be selected by clicking Select over the 'pop-up' button next to each field. For the purposes of this tutorial, we shall leave them all blank, so that your viewers' standard colour scheme will be used.
Click on OK to create your page. You should now see the HTML heading appear in the newly opened document window, with the toolbar floating above it. Now we can begin to edit our document... 9) Click Select in the blank line between <BODY> and </BODY>. The caret should move and position itself at the start of the line.
You can now enter the text that will form the main part of you Web page. You can either enter the text directly, as you would into a word processor, or you can import text from another file. We shall use both methods to create our first page.
10) Enter the following text, with the second paragraph as one line:
The World Wide Web is a huge collection of linked documents, residing on thousands of computers around the world. This particular page was created with HTMLEdit from R-Comp.
|
Preview
Line Break
Paragraph |
11) If you now click Select on Preview Page, at
the top right of the toolbox, you should see the
page in your Web Browser (alternatively, ctrl-P
previews the page). However, the gap left
between the first line and the main text will have
disappeared!
The reason for this is that in HTML, pressing return is equivalent to pressing the space bar. This has its advantages in that you can make your HTML easier to read on screen, without significantly altering the final appearance of your document in a Web Browser. So, close the window of your Web Browser and go back to your page.
To start a new line, type <BR>. If you wish to start a new paragraph, you should use <P>. These tags are available from the buttons shown left. The toolbar context sensitive info should be of use here.
12) Click once with Select in the blank line between the first and second lines of the main text that you entered. Type: <P>
13) Now click on Preview Page again. This time, the page should look more like what you were expecting. Always remember to include the line and paragraph break tags (<BR> and <P> respectively) when creating your own pages!
We can now add some more text to our document by importing some from a separate file. For this tutorial we shall use Text1 which can be found in the Tutorial directory. Note that this first text file has already the appropriate <BR> and <P> tags inserted (it was, in fact, saved as text from HTMLEdit).
14) Click at the end of your main text in the HTMLEdit window, and press Return. Type: <P> and press Return again.
15) Drag the icon of the file Text1 from the Tutorial.Texts directory to just after this <P>. When you release Select, the text should be imported and added to your document. Click on Preview Page again to view the results.
16) Close the Preview, and click once more after the final <P> in your document.
As already stated, the first text we included had already been 'marked up' (had the tags added), but this is not usually the case. HTMLEdit allows you to take raw text files, and automatically mark them up. We shall do this for the second half of the document.
|
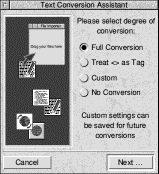
Text Conversion Assistant |
17) Click on the Import button to the top right of
the toolbar. The import window now opens. Drag
the Text2 file from the Texts directory onto this
window. This time the Text Conversion Assistant
appears:
18 The Text Conversion Assistant is fairly self- explanatory. All the options are explained in the Custom window, but for now we shall use the Full Conversion option. This will make the following changes:
19) Click on Next... to import the text, and then press Ctrl-P to preview your final page (or click on the preview button).
20) Finally, close the Preview again, and click in the HTMLEdit document window. Press on the save button on the top row of the toolbar. As you have already saved your document (in the DCA - you did save, didn't you?), the save button will update the existing file with your new data. This session shows you how to add images to your HTML documents using HTMLEdit. It also demonstrates the way HTMLEdit uses special dialogue boxes for more complicated HTML tags.
|
Image setup window |
1) If you don't already have the page you created in
Session 1 loaded into HTMLEdit, either drag the
file you saved onto the HTMLEdit icon on the
iconbar, or copy the Session1 file from the
Tutorial.Sessions directory into the Tutorial
folder, then load that.
2) Click once with Select just after the first <P> tag (after 'A simple HTML page'). Press Return.
3) Click Select on the Image button (shown left) to bring up the Image Setup dialogue box.
This dialogue box contains icons giving access to all the properties of an image that HTMLEdit supports. If future developments in HTML occur and new properties appear, you can enter these extras in manually after the tag has been created.
4) Open the Tutorial directory, and drag the file Image1/gif from the Images directory of the Tutorial folder into the field next to 'Image Filename:'. You will notice that the '/' in the filename is translated as a '.' - this is the standard way in which Web Browsers work. An Acorn Web Browser will translate the '.' back into a '/'. This represents the UNIX/DOS origins of the Web.
5) The image which we are adding is a graphical heading. Some people use Web Browsers which cannot display graphics, so it is good practice to provide a textual alternative. Click in the Alternative text field and type:
6) Since the document has been left aligned thus far, and this image is to be left aligned, ignore the Alignment options, and click on the OK button. The tag is inserted into your document.
7) To finish setting up the image we need to include an appropriate combination of line and paragraph breaks. Exactly which breaks are required depends to some extent on the Web Browser, and the way in which it has been written. However, the following combination appears to work well:
<BR> 8) You should now click on the Preview Page button on the toolbar. If you have done everything correctly, the page should be loaded into your Web Browser, with an image below the first line of text. Note that HTMLEdit will save your page for you when you click on Preview.
The first image had already been converted into a suitable format for use with WWW pages. We shall now use HTMLEdit to convert a sprite automatically.
9) Click after the <P> below the first main paragraph (which ends 'from R-Comp'). Press return, and click on the Import button.
10) Drag Pic2 from the Images directory onto the Import window. The Image Conversion Assistant will start up (as it did for background images in the previous tutorial).
11) Purely for the sake of variety, choose the JPEG option, and click on Next... The next window (shown opposite) allows you to choose options for your JPEG, however, in all but the rarest of occasions, the standard settings are fine, so click again on Next...
12) You will now be prompted to save your converted image. We recommend saving it as Image2/jpg in the same Images directory where you found Pic2 in the first place.
The file will be converted and saved under the new name. You will then be asked how you wish to use the image in your document. Here we wish to include it in the document - we don't want to create a link to it, so choose the appropriate option.
The Image window will then open, with the details of the file filled in.
13) Set the alternative text to:
|
|
14) We want this image to be right aligned, so click
select on the 'Right' Image Alignment icon. Now
click on OK to insert the tag.
15) Again, add the paragraph and line break combination:
<BR> 16) Finally click select on the Preview button, to see the final product. Depending on your particular Web Browser, this second image should be right aligned. You have now added two images to your page, and experimented with the alignment tools. We have not looked at the text alignment options, but these should be fairly self-explanatory. If you want to have text beside your image, it can be displayed at the top, middle or bottom of the graphic. Simply click on the appropriate icon in the Image Setup window.
|